Summary
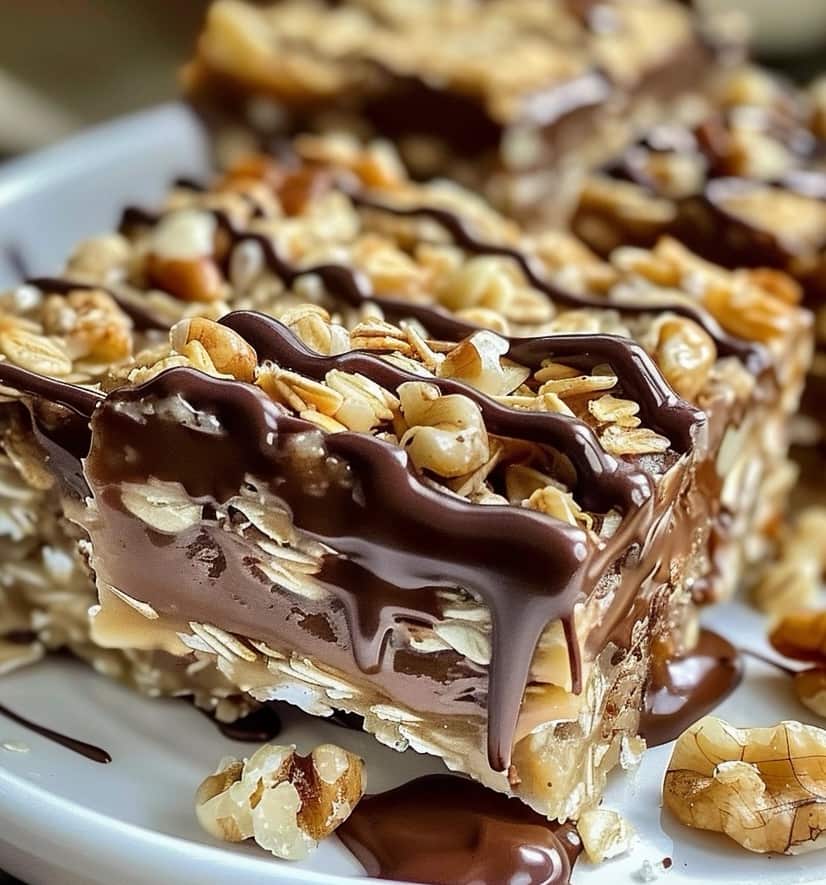
These no-bake chocolate peanut butter oat bars combine the perfect balance of sweet and salty flavors with contrasting textures. The recipe creates a satisfyingly chewy oat and peanut butter base topped with a smooth chocolate layer that sets up perfectly without requiring any baking. Ready in just about an hour (mostly chilling time), these bars are quick to make and perfect for satisfying chocolate cravings or providing a nutritious energy boost.
Equipment
- 8×8 inch square baking pan
- Parchment paper
- Medium saucepan
- Mixing bowl
- Measuring cups and spoons
- Spatula or wooden spoon
- Small microwave-safe bowl (for melting chocolate)
Ingredients
- 1 cup butter (2 sticks)
- 1/2 cup brown sugar, packed
- 1 teaspoon vanilla extract
- 3 cups old-fashioned rolled oats
- 1/2 cup creamy peanut butter
- 1/4 teaspoon salt
- 1 1/2 cups semi-sweet chocolate chips
- 1/4 cup creamy peanut butter (for chocolate layer)
Instructions
- Line an 8×8 inch baking pan with parchment paper, leaving overhang on the sides for easy removal. Set aside.
- In a medium saucepan over medium heat, melt the butter. Add brown sugar and stir until dissolved, about 2 minutes.
- Remove from heat and stir in 1/2 cup of peanut butter and vanilla extract until smooth.
- Add the oats and salt to the peanut butter mixture. Stir until everything is well combined and the oats are completely coated.
- Transfer the oat mixture to the prepared pan. Using the back of a spatula or your hands, press the mixture firmly and evenly into the pan. Place in the refrigerator for 15 minutes to firm up slightly.
- While the base is chilling, prepare the chocolate layer. In a microwave-safe bowl, combine chocolate chips and remaining 1/4 cup peanut butter. Microwave in 30-second intervals, stirring between each, until completely melted and smooth.
- Pour the chocolate mixture over the chilled oat layer, spreading it evenly with a spatula.
- Return the pan to the refrigerator and chill for at least 1 hour, or until the chocolate layer is completely set.
- Once set, use the parchment paper overhang to lift the bars out of the pan. Cut into 16 squares with a sharp knife.
Notes
- For cleaner cuts, run your knife under hot water and wipe it clean between cuts.
- These bars can be stored in an airtight container in the refrigerator for up to a week or frozen for up to 3 months.
- The bars are somewhat crumbly when eaten directly from the refrigerator; let them sit at room temperature for about 10 minutes before serving for the perfect texture.
Tips for Success
- Toast the oats first: For enhanced nutty flavor in your oat and peanut butter bars, spread the oats on a baking sheet and toast them in a 350°F oven for about 10 minutes before using them in the recipe.
- Use natural peanut butter cautiously: While natural peanut butter works, it can make the oat with peanut butter mixture slightly oilier and less stable. If using natural peanut butter, you might need to add an extra 1/4 cup of oats to achieve the right consistency.
- Temperature matters: Allow the melted butter and sugar mixture to cool slightly before adding the peanut butter to prevent it from separating.
- Press firmly: When forming the base layer, press the oats peanut butter mixture very firmly into the pan. This ensures the bars will hold together well when cut.
- Chill between layers: Don’t skip the chilling step between adding the oat base and the chocolate layer. This prevents the layers from mixing.
Additional Tips and Variations
- Crunchy twist: Add 1/2 cup of rice crispy cereal to the oat mixture for added texture.
- Nutty variation: Incorporate 1/3 cup of chopped nuts (walnuts, almonds, or pecans) into the oat base for extra crunch and nutrition.
- Chocolate lovers: Add 1/4 cup mini chocolate chips to the oat and peanut butter recipes mixture before pressing into the pan.
- Sea salt finish: Sprinkle flaky sea salt on top of the chocolate layer while still wet for a sophisticated sweet-salty flavor profile.
- Sweet drizzle: Drizzle melted white chocolate in a zigzag pattern over the set chocolate top for an elegant presentation.
- Flavor swap: Replace peanut butter and chocolate with almond butter and butterscotch chips for a different flavor profile.
- Protein boost: Add 2 tablespoons of protein powder to the oat mixture to create more nutritious energy bars.
Frequently Asked Questions (FAQ)
Q: Can I make these peanut butter chocolate oats bars gluten-free? A: Yes! Simply use certified gluten-free oats to make these treats completely gluten-free.
Q: Why are my bars crumbling when I cut them? A: This could happen if the oat and peanut butter mixture wasn’t pressed firmly enough into the pan or if the bars are too cold when cutting. Let them sit at room temperature for 10 minutes before cutting with a warm knife.
Q: Can I reduce the sugar in this recipe? A: Yes, you can reduce the brown sugar to 1/3 cup without significantly affecting the texture. You could also use a natural sweetener like honey or maple syrup, though this will slightly change the consistency.
Q: How can I make these butter chocolate bars vegan? A: Substitute the butter with coconut oil or vegan butter, and make sure to use dairy-free chocolate chips.
Q: Can I use quick oats instead of old-fashioned rolled oats? A: Yes, but the texture will be less chunky and more uniform. The bars might also be slightly more dense.
Conclusion
These no-bake chocolate peanut butter oat bars represent the perfect intersection of convenience, nutrition, and indulgence. The humble combination of oat and peanut butter creates a base that’s not only delicious but also filling and nutritious, while the peanut butter chocolate topping satisfies those sweet cravings we all experience. What makes this recipe truly special is its adaptability—you can easily customize it to suit dietary needs or flavor preferences while maintaining the essence of what makes these bars so beloved.
Whether you’re making these as an after-school snack, a hiking energy boost, or a dessert to share with friends, these chocolate bar treats are sure to impress without demanding too much of your time or culinary expertise. The fact that they store so well makes them perfect for busy weeks when you need grab-and-go options that don’t sacrifice quality or taste. Give these no-bake chocolate oat bars a try, and discover why this simple combination of ingredients has earned a permanent place in so many recipe collections!