I did some research online looking for the best method (and easiest) to remove the build-up. I decided to start with the vinegar method. It seemed the simplest and I already had vinegar on hand so off I went.
Step 1 – Vinegar
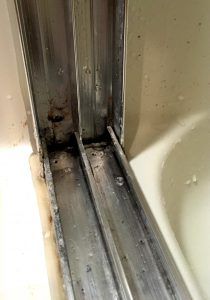
The first step was to pour vinegar into the shower tracks. My tracks have little holes to allow the water to drain out so I plugged those with paper towels. That wasn’t the perfect solution as it still drained out once the paper towel was soaked but it did a good enough job. A rag or something thicker than a paper towel may work better.
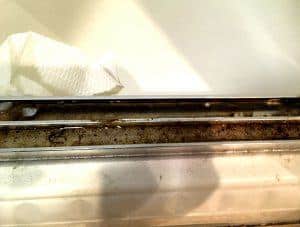
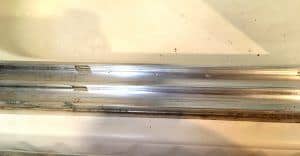
After I let the vinegar sit for about 30 minutes, I removed the paper towels blocking the drain holes. Then I grabbed a clean paper towel and wiped out the tracks. Most of the grime and stains from within the shower door tracks were removed with that one swipe! I grabbed a toothbrush and scrubbed the hard to reach places that I couldn’t reach with the paper towel. (If you don’t have an old toothbrush, I found a multi-pack for a $1 at Walmart). There was still a little area under the door in the track that I couldn’t reach with the toothbrush. For under the doors, I used a paper towel soaked with vinegar and gently shoved it under the door in the track. Since I already had let the vinegar sit in the tracks, the grime was already loosened so it didn’t take much to clean it.
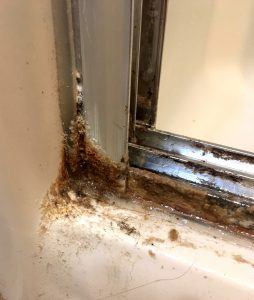
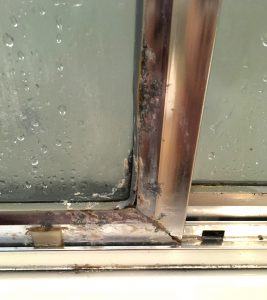
For the vertical tracks, I soaked some paper towels with vinegar and shoved them into the tracks and let them sit. As I removed the paper towels, I wiped down the tracks as I removed them and then used the toothbrush again for the tight corners.
Step 2 – Baking Soda
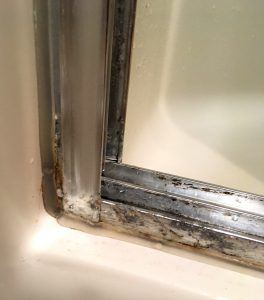
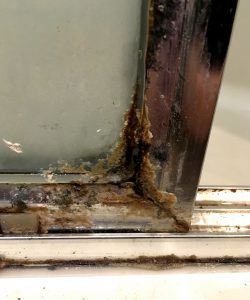
Now, I moved on to tackle the mineral build-up on the top and outside of the shower door tracks, as well as some vertical part of the tracks. I really didn’t know if they would be able to come clean but I was going to give it my best shot.
I mixed some baking soda with water in a little bowl to make a paste. Using a rag, I applied the paste to the build-up on the top and outside of the track and in the vertical section of the track and let it sit there. I don’t remember how long I let it sit there as I was working on other things but I would say probably 30 minutes. I wiped off the paste with a wet rag and surprisingly, quite a bit came off in the first swipe. If your doors don’t have a lot of build-up like mine did (and I’m sure they probably don’t), you might be done with that initial cleaning.
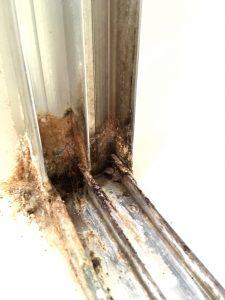
Unfortunately, due to my lack of cleaning, this task was going to take some elbow grease. I repeated the baking soda step over again. This time instead of wiping it off with a wet rag, I used a little metal scraper and scraped the mineral deposit build-up. Some areas required more than others, especially the top of the shower door track right section next to the wall. Since that one spot had so much build-up, I actually had to chip away at it with the metal scraper. I repeated with baking soda over and over until finally the build-up was gone!
Shower Doors
Again, I started with the vinegar. I poured some into a spray bottle and sprayed the vinegar at the top of the build-up and let it run down the grime. I also used the baking soda paste to remove the grime and build-up that was still left on the metal edges of the shower doors. Just as I did with the shower door tracks, I applied the paste to the door and let it sit. Then I wiped and scraped off the build-up from the shower door corners and along the bottom of the door. Thankfully, this was not anywhere near as bad as the tracks so I only have to repeat it once.
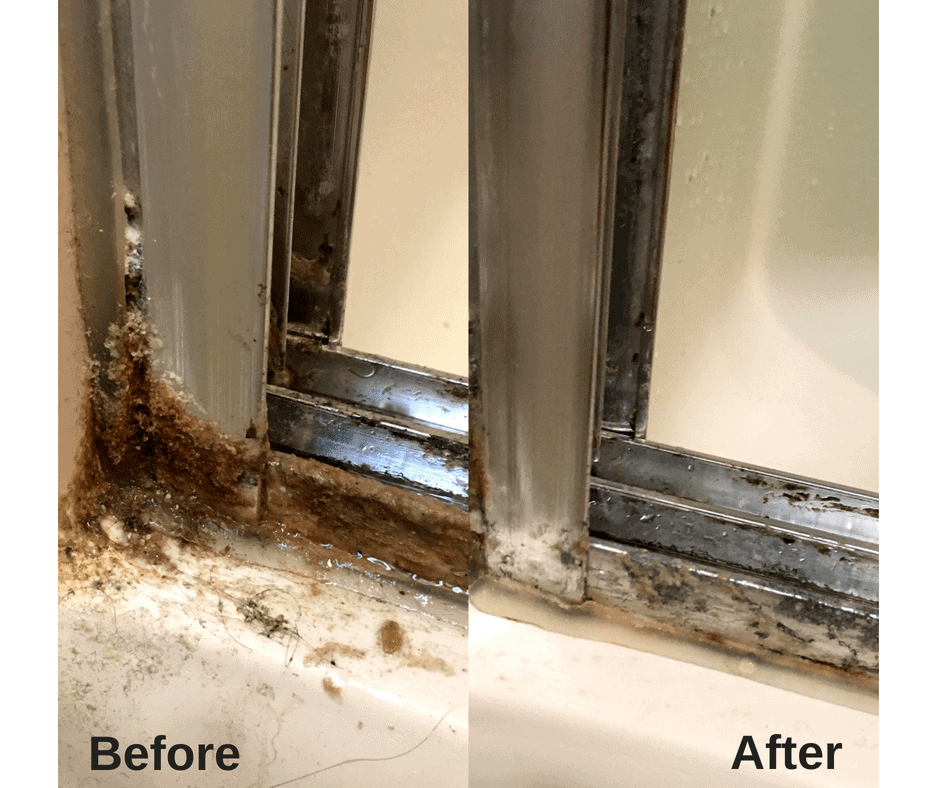
**Disclosure** You may notice in the after picture that there is still some build-up on the door and edge. I had to stop to pick up my kids at school, so I will need to finish it on another day.
Rinse
After I finally got the limescale and mineral build-up off, I washed everything down. I gently poured water into the tracks to remove any leftover dirt and grime being careful to not overflow the tracks. I used a clean, wet rag to wash everything else.
Final Tips
One of the benefits of the vinegar and baking soda method is that they are natural cleaners. I figured since they were natural, I wouldn’t need gloves. Through my lengthy cleaning process, I learned that while they are natural, gloves would have been a good idea. At the end of the day, the skin on my fingertips was incredibly dry and peeling. While this obviously isn’t a really big deal, it is a little sore and inconvenient. If I ever have to do an in-depth cleaning again, I will be wearing gloves.
If your shower door tracks have a lot of build-up like mine, I want to be completely honest. I don’t want to make this seem like a quick wipe and you are done. However, with some elbow grease, you can get the build-up off and it is definitely worth it!
In order for me to not have to go through this again, I will be wiping my doors down and cleaning on a regular basis. Now instead of hating to look at my shower doors, I actually look at it and smile. I can’t believe the difference! I just wish I would have spent the time and done it years ago! Not only does it look so much better but it actually feels great to accomplish something!